Lost in Transit
  • Home
  • The van
  • 2015 Journey
  • The Route
  • Renault Master camper conversion
  • Resources

The Van's Construction : Renault Master campervan conversion

Weighty Issues

16/2/2015

 
There are three reasons why one has to take great note of the ultimate weight of your completed van project.
Firstly,your licence may restrict you to a vehicle of no more than 3500 kg.In common with folks of my age,my licence has "grandfather rights" ,allowing me to drive a vehicle up to 7500 kg weight,but younger drivers would not have this eligibility.

Secondly,the heavier the load in the van,the greater the fuel consumption,hence the build needs to done be with lightweight materials wherever possible, with this in mind.

Thirdly,and most importantly,Renault  have quoted my van as having a Maximum Authorised Mass,or MAM(Gross vehicle weight) of 3500kg. If it ends up weighing any more than this ,not only would it be illegal,but also unsafe,and risks the van being immediately banned from the road if caught at a police goods vehicle spot check.
Not only this,but the individual axles of my van have maximum safe loadings of 1860 kg for the front,  and 2060 kg for the rear (the sum of the axle loadings is greater than the MAM ,to allow for load variation)
These figures are quoted on the chassis number plate attached to the vehicle.

Therefore it was with some trepidation that ,with the van build now fully complete,and with water ,diesel,and gas tanks all full to the brim,and carrying driver and one passenger and all the accoutrements needed for normal trips(eg kitchen utensils,hook up cables,etc)we visited the local public weighbridge,which is the local SITA bin lorry depot,for formal weighing and printouts.

The verdict is highly reassuring:-
Front axle      1620kg
Rear axle       1220 kg
Total weight   2880kg

That leaves me a payload of 620 kg,which gives ample allowance for a possible third passenger, a couple of dogs, bedding,personal luggage,2 or 3 days of food supplies etc ....and quite a considerable amount of wine !

The result is in some ways surprising given the vast amount of material that has been swallowed by the build.For example no less than sixty  x 2.4 metre lengths of  44mm x 18mm pine have vanished into it somewhere .


Tables

9/2/2015

 
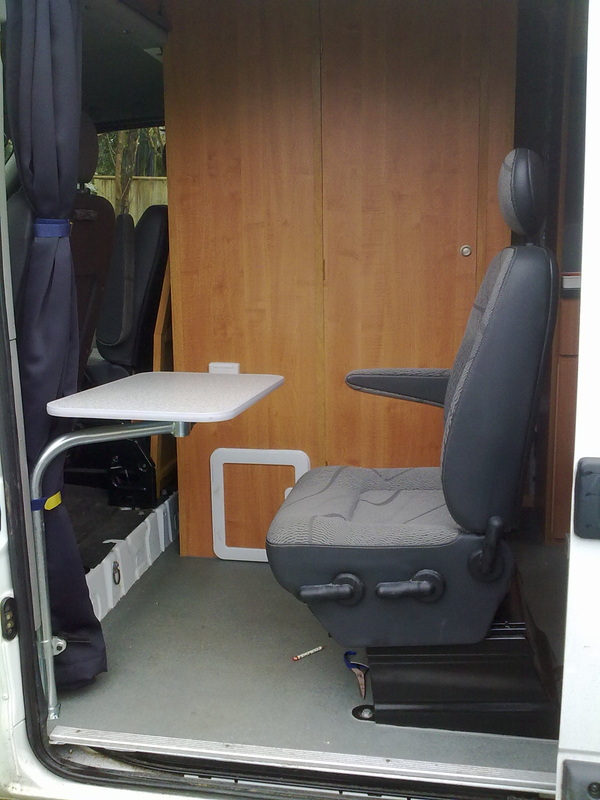
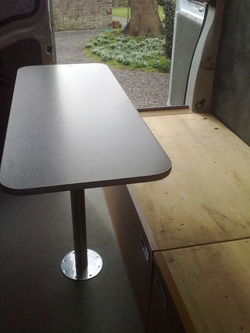
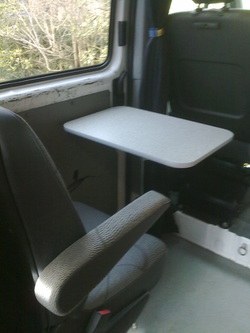
I have inserted no less than two tables in the van,a main dining table in the rear and a small 'workdesk' in the front,by the 3rd seat.Both are detachable and stowable for travelling,or if space is needed.They can be stowed securely in a slot between the driver's seat and the washroom wall
Tables upright...........
Picture
Small table in the front

Picture
Picture
Main table in the rear

And stowed away for travel....
Picture
Picture
Picture
Picture

It's not a gas !

8/2/2015

 
Installing the gas supply has proved to be the biggest headache of the whole project.

The initial considerations were that gas in some form was needed,to cook on.Further plans developed to include  both gas fired air ,and water,heating.

The campinggaz  cylinders used widely in this country ,which are exchanged when empty for a new full cylinder,are available in France,but surprisingly,in few other countries.Each country seems to have its own type of portable gas cylinders,so  to avoid having to take a variety of refillable cylinders,the solution is to have an LPG tank which can be refilled at fuel stations.These take the form of upright cylinders such as those provided by Gaslow,and which are normally kept within the van,or horizontal tanks which are normally under-slung beneath  the van.From the outset it was clear that the upright cylinders take up too much space for a small van(i.e. cant be stored beneath a seat)and there was no feasible space beneath a Renault Master for an under-slung tank.The handbrake is operated by a rod which runs the length of the van under the middle of the chassis,effectively dividing the space in two,and neither half is wide enough to fit a tank.

I therefore opted to ,unusually,fit a horizontal tank WITHIN the van,and this led to a series of problems which in the end,fortunately ,were overcome.


Picture
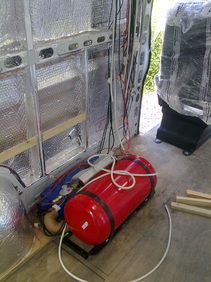
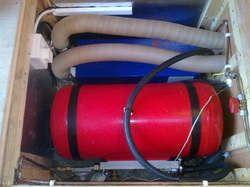
The first attempt at an install.

On-board gas tanks need to be,for safety reasons,in their own metal-lined sealed container(which gives 30 minutes protection in case of fire) which also has floor drop-out vents to enable any leaking gas (which is heavier than air)to escape .My original specification to my installer was for the gas tank to be in such a gas locker. The tank was always going to be adjacent to the electric/gas heater, as there was really nowhere else to put either of them in my layout: however, when I got the van back I found the gas tank was not in a metal lined locker, and the only floor vent was under the heater. At this stage I was not too alarmed but it was clear that it would be hard to completely separate the gas tank from the heater, a potentially explosive combination. This, I think, was partly my fault for being unclear in my demands,and this was due to lack of knowledge on my part.


Picture
With this first install,the regulator and tap(in the silver unit)were angled at the top of the tank.This proved to be a mistake,as these tanks are designed to be under-slung, with the silver part below the tank.There is a  the safety valve connected to a float inside the tank which senses when the tank is 80% full,and stops any further filling. With the silver unit on the upper side of the tank the float is permanently  tipped on/valve shut  in this position.When I came to fill the tank-nothing could go in ! Although the fitter had apparently installed such tanks under vans before, this was the first one  he had installed on-board .

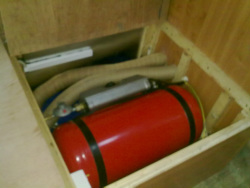
Before I knew of these issues, in good faith I went ahead and built the bed ,encasing the tank and gas heater very solidly in an under-seat locker, as seen in this picture.

Picture
The second attempt.

Back the van went to Clutton.The tank needed turning over.The valve is now angled in a position which allows the tank to be filled.The cramped box which I had built around the tank after the initial install,created a challenge when it came to moving the tank,but it was just possible.I took the opportunity to request a further drop-out vent be installed under the gas tank, with a view to later fitting a divider between the heater and the tank.

All the pipework was then run to the 3 gas appliances,the air heater(in the picture),and the water heater and the cooker hob on the other side of the van (via a metal pipe that runs down through the floor, across under the chassis, and back in through the floor the other side).Isolation taps/manifolds were fitted to the pipework leading to all 3 appliances. In this position the tank could now be filled with gas.

Unfortunately,as soon as the tank was filled,a huge leak in the connection to the regulator revealed itself !!.

This was due to a faulty fitting of the regulator (it later proved to be of an inferior type,too)This was seemingly fixed after yet another return to Clutton ,but after 3 months during which the build  project continued ,eventually the gas started leaking from the regulator connection again.


Picture
Third attempt.

This time I did what I should have done at the start,and consulted an expert installer,Autogas Leisure 2000,of Thirsk.This is a small family business which fits LPG fuel tanks to vehicles, and  gas tanks to campervans. They have converted some of the Queens's cars to LPG.

They even offer a free overnight stopover in their yard with electrical hook-up, very necessary when I went up in January with snow on the ground,the gas part of the heater of course being inoperable at that time , but fortunately the 240v electric part works independently.

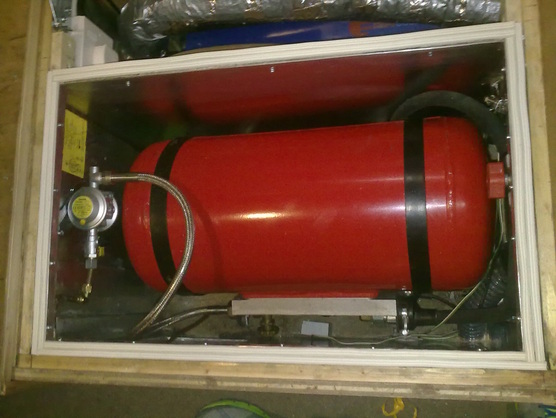
They removed the faulty regulator that had been poorly installed,and put in a superior version.I was given firm and sound advice about the need for the tank to be housed in its own sealed metal lined box.With the inflow pipe changed to a different position(coming up through the floor directly alongside the tank),this suddenly became achievable. The 3mm aluminium sheet which I obtained to do the job with was very easy to work with. It cut  easily with a standard hand held jigsaw fitted with a metal-cutting blade, and was easy to fold  to create right-angled corners, and overlapping seams.It was quite time consuming to craft panel linings from a number of interlocking pieces to cover over all the wooden bulkheads making up my box
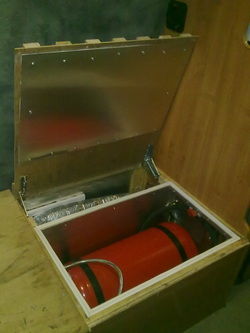
I was able to make use of the wooden lid which had already constructed,which just needed a metal sheet fixing to it.With some draft excluder strip stuck all around the top lip of the box ,which forms a good seal when the lid is closed,I now have an airtight gas locker(except for the drop-out in the floor)I have not got metal lining the floor, but the Autogas experts felt this was not vital(there being,of course, the metal van floor beneath the plywood panel floor sheet)

The system was pressure tested--no leaks !!

Picture
The completed ,functional, gas locker

    Renault Master campervan self-build

    Archives

    August 2015
    February 2015
    January 2015
    December 2014
    November 2014
    August 2014
    July 2014
    June 2014
    May 2014
    April 2014

    Categories

    All

    RSS Feed

Web Hosting by iPage