Installing the gas supply has proved to be the biggest headache of the whole project.
The initial considerations were that gas in some form was needed,to cook on.Further plans developed to include both gas fired air ,and water,heating.
The campinggaz cylinders used widely in this country ,which are exchanged when empty for a new full cylinder,are available in France,but surprisingly,in few other countries.Each country seems to have its own type of portable gas cylinders,so to avoid having to take a variety of refillable cylinders,the solution is to have an LPG tank which can be refilled at fuel stations.These take the form of upright cylinders such as those provided by Gaslow,and which are normally kept within the van,or horizontal tanks which are normally under-slung beneath the van.From the outset it was clear that the upright cylinders take up too much space for a small van(i.e. cant be stored beneath a seat)and there was no feasible space beneath a Renault Master for an under-slung tank.The handbrake is operated by a rod which runs the length of the van under the middle of the chassis,effectively dividing the space in two,and neither half is wide enough to fit a tank.
I therefore opted to ,unusually,fit a horizontal tank WITHIN the van,and this led to a series of problems which in the end,fortunately ,were overcome.

The first attempt at an install.
On-board gas tanks need to be,for safety reasons,in their own metal-lined sealed container(which gives 30 minutes protection in case of fire) which also has floor drop-out vents to enable any leaking gas (which is heavier than air)to escape .My original specification to my installer was for the gas tank to be in such a gas locker. The tank was always going to be adjacent to the electric/gas heater, as there was really nowhere else to put either of them in my layout: however, when I got the van back I found the gas tank was not in a metal lined locker, and the only floor vent was under the heater. At this stage I was not too alarmed but it was clear that it would be hard to completely separate the gas tank from the heater, a potentially explosive combination. This, I think, was partly my fault for being unclear in my demands,and this was due to lack of knowledge on my part.
On-board gas tanks need to be,for safety reasons,in their own metal-lined sealed container(which gives 30 minutes protection in case of fire) which also has floor drop-out vents to enable any leaking gas (which is heavier than air)to escape .My original specification to my installer was for the gas tank to be in such a gas locker. The tank was always going to be adjacent to the electric/gas heater, as there was really nowhere else to put either of them in my layout: however, when I got the van back I found the gas tank was not in a metal lined locker, and the only floor vent was under the heater. At this stage I was not too alarmed but it was clear that it would be hard to completely separate the gas tank from the heater, a potentially explosive combination. This, I think, was partly my fault for being unclear in my demands,and this was due to lack of knowledge on my part.
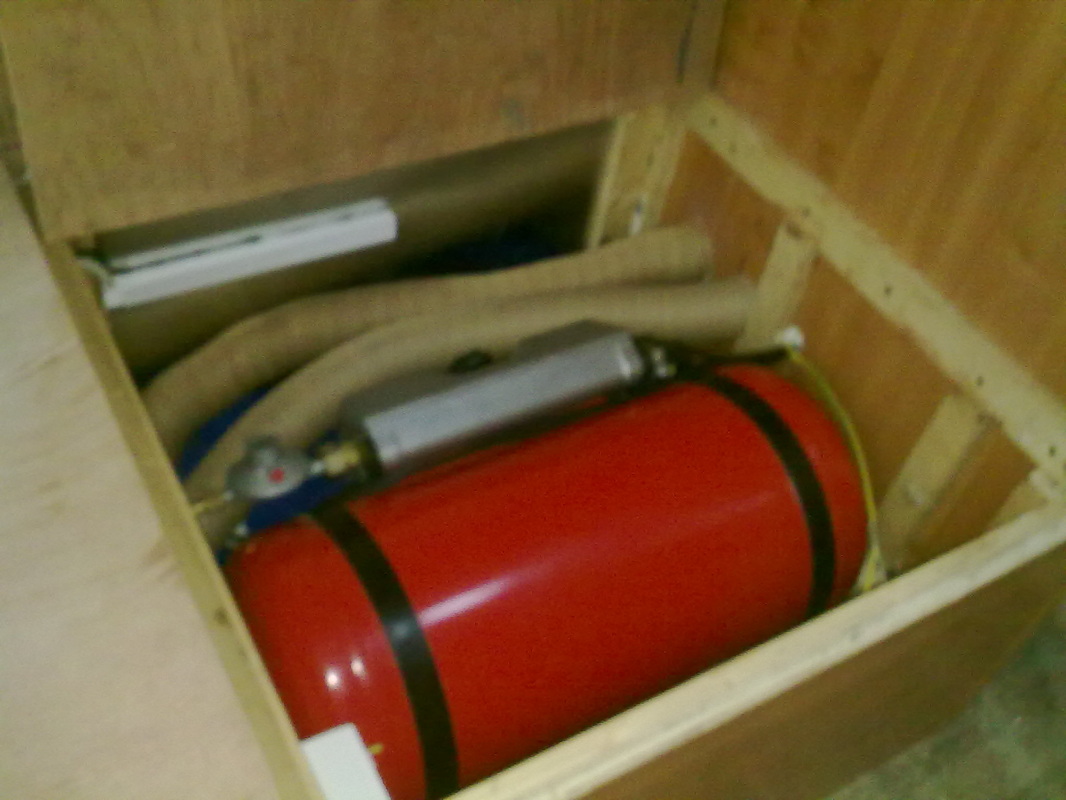
With this first install,the regulator and tap(in the silver unit)were angled at the top of the tank.This proved to be a mistake,as these tanks are designed to be under-slung, with the silver part below the tank.There is a the safety valve connected to a float inside the tank which senses when the tank is 80% full,and stops any further filling. With the silver unit on the upper side of the tank the float is permanently tipped on/valve shut in this position.When I came to fill the tank-nothing could go in ! Although the fitter had apparently installed such tanks under vans before, this was the first one he had installed on-board .
Before I knew of these issues, in good faith I went ahead and built the bed ,encasing the tank and gas heater very solidly in an under-seat locker, as seen in this picture.
Before I knew of these issues, in good faith I went ahead and built the bed ,encasing the tank and gas heater very solidly in an under-seat locker, as seen in this picture.
The second attempt.
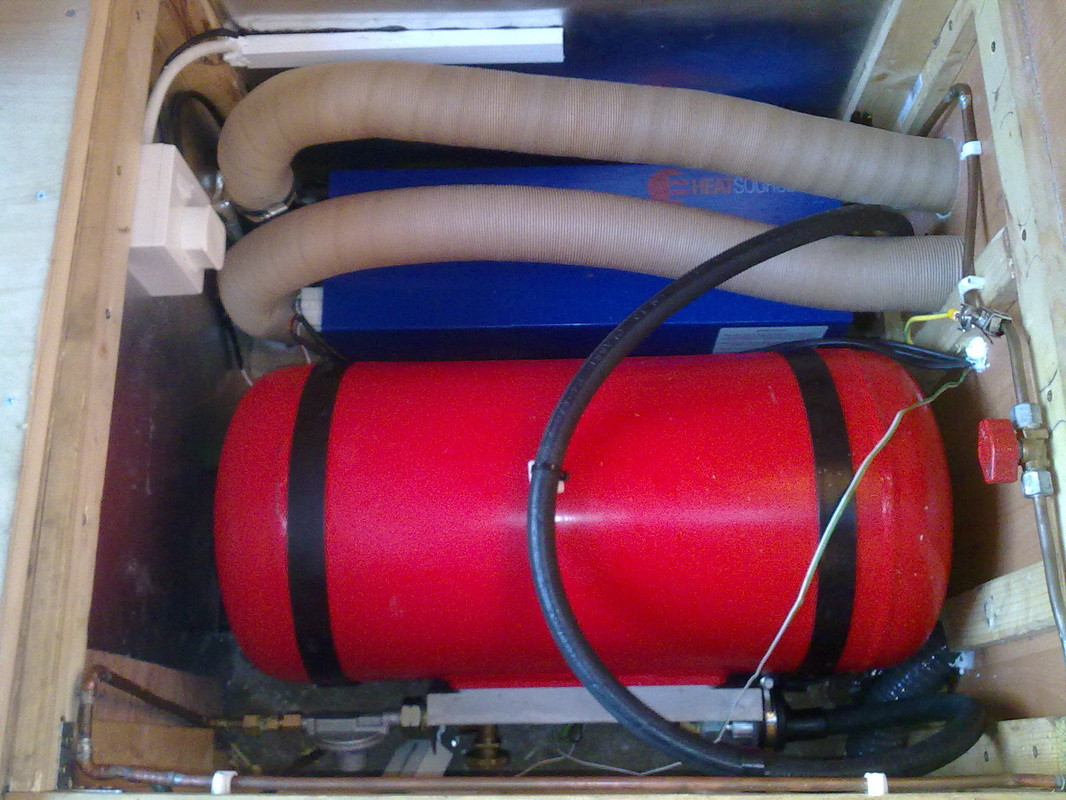
Back the van went to Clutton.The tank needed turning over.The valve is now angled in a position which allows the tank to be filled.The cramped box which I had built around the tank after the initial install,created a challenge when it came to moving the tank,but it was just possible.I took the opportunity to request a further drop-out vent be installed under the gas tank, with a view to later fitting a divider between the heater and the tank.
All the pipework was then run to the 3 gas appliances,the air heater(in the picture),and the water heater and the cooker hob on the other side of the van (via a metal pipe that runs down through the floor, across under the chassis, and back in through the floor the other side).Isolation taps/manifolds were fitted to the pipework leading to all 3 appliances. In this position the tank could now be filled with gas.
Unfortunately,as soon as the tank was filled,a huge leak in the connection to the regulator revealed itself !!.
This was due to a faulty fitting of the regulator (it later proved to be of an inferior type,too)This was seemingly fixed after yet another return to Clutton ,but after 3 months during which the build project continued ,eventually the gas started leaking from the regulator connection again.

Third attempt.
This time I did what I should have done at the start,and consulted an expert installer,Autogas Leisure 2000,of Thirsk.This is a small family business which fits LPG fuel tanks to vehicles, and gas tanks to campervans. They have converted some of the Queens's cars to LPG.
They even offer a free overnight stopover in their yard with electrical hook-up, very necessary when I went up in January with snow on the ground,the gas part of the heater of course being inoperable at that time , but fortunately the 240v electric part works independently.
They removed the faulty regulator that had been poorly installed,and put in a superior version.I was given firm and sound advice about the need for the tank to be housed in its own sealed metal lined box.With the inflow pipe changed to a different position(coming up through the floor directly alongside the tank),this suddenly became achievable. The 3mm aluminium sheet which I obtained to do the job with was very easy to work with. It cut easily with a standard hand held jigsaw fitted with a metal-cutting blade, and was easy to fold to create right-angled corners, and overlapping seams.It was quite time consuming to craft panel linings from a number of interlocking pieces to cover over all the wooden bulkheads making up my box
I was able to make use of the wooden lid which had already constructed,which just needed a metal sheet fixing to it.With some draft excluder strip stuck all around the top lip of the box ,which forms a good seal when the lid is closed,I now have an airtight gas locker(except for the drop-out in the floor)I have not got metal lining the floor, but the Autogas experts felt this was not vital(there being,of course, the metal van floor beneath the plywood panel floor sheet)
The system was pressure tested--no leaks !!

The completed ,functional, gas locker
 RSS Feed